Whitecoal
(?)Community Member
Offline
- Posted: Wed, 25 May 2005 00:04:34 +0000
Welcome to
The Tutorial Project
This is the first batch of tutorials that have been cooked up to answer the noob's most common Avi-Edit related question: How do you create those? (Or, in correct Noobish: how u mak teh avi cul lik dat? ~or something like that)
This is a compilation of several artist's tutorials who whished to share their knowledge with you. Even if you do already create Avatar Edits, this is here to help you enrich your artistic ability, or perhaps teach you something new.
If you wish to add your own tutorials to this, please send them to me in a PM. I will then verify and edit, and then post it (if it is deemed usefull).
We would like Sticky-ness very much, thank you.
Thank you, and now, let it begin!
Thank you all very much for reading the tutorials!
Please Note that I had to edit the tutorials slightly (spelling and such).
Advertisments:
If you would like to advertise in this space please PM me. I will not advertise all things, only those I approve of.
Whitecoal's Avatar Edit Shop! Click on the journal icon in my signature!
The Laundry Basket of Doom
The Tutorial Project
This is the first batch of tutorials that have been cooked up to answer the noob's most common Avi-Edit related question: How do you create those? (Or, in correct Noobish: how u mak teh avi cul lik dat? ~or something like that)
This is a compilation of several artist's tutorials who whished to share their knowledge with you. Even if you do already create Avatar Edits, this is here to help you enrich your artistic ability, or perhaps teach you something new.
If you wish to add your own tutorials to this, please send them to me in a PM. I will then verify and edit, and then post it (if it is deemed usefull).
We would like Sticky-ness very much, thank you.
Thank you, and now, let it begin!
(Alissa)'s Tutorial
This is actually the first tutorial I've actually completed.
[Alissa]'s Avatar Edit Tutorial (For Photoshop/Photoshop Elements)
Notes: I happen to be using Photoshop Elements on a Mac with a mouse. I have no tablet. If you are looking for a tutorial that involves a tablet, you are in the wrong place. Also, if you have problems with my screencaps, then go away. All complaints go straight to 6blackraven9.
1. Decide who you want to make your avatar look like. It's easier to edit your avatar when you have a reference picture. You can also steal colors from said reference picture, therefore making your life much easier. So, I will get my reference picture. Paste it into your graphics program.:
2. Then get a naked avatar. You can use your own or you can get one off of GAC or GAvSim. Here is mine. Paste it into your graphics program:

3. Zoom in to 'Fit on screen.' Make a new layer and start drawing on one of the clothing items. I'll start with her top. Take two colors from the picture with the Eyedropper: One dark and one lighter. Use the darker one to outline the shape of the item you are editing onto the avatar. Make sure you are using the pencil tool: size one. After that, use the pencil tool or the fill tool to fill in the item. (The fill tool overflows, so you will have to erase some things.) Continue doing this with all other items until you have the outline and the fill of everything.
4. Once you have finished doing the simple things, start to add more detail. Make sure you have a separate layer for everything. Layers are your friends. As you can see, I added cuffs and buttons to the shirt:
5. After you finish adding everything, it's time for the shading. Wahoo! And my edit is actually starting to look like the uniform Hiyono is wearing. Hooray! Use the eyedropper tool to get a darker color to use, as well as a lighter color, different than the colors used on the item. If you need to, take the color from your edit and change it so it is darker (/ lighter). Now use the brush tool. Choose one of those fadey-brush thingies with a size two or three. (Sometimes even one) I will use a size two. Make a new layer and stick it right over the layer of the article of clothing you want to shade. I will label my layer "Top shading" and put it on top of the layer "Top." I take my fadey brush thingy in a darker color and shade the areas that need to be shaded with it. Don't worry if it looks bad. Don't try to fix it yet. With pleated skirts (I make my pleated skirts weird), add a lot of shading. It ends up looking better that way:
6. Smudgy time! The smudge tool is one of my favorite tools, and without it and the Undo feature, I don't think I would be able to edit avatars. Take the smudgy tool and set it to a strength of about 70% with a brush size of 3. Smudge what you think is needed. (Example: If you think the shading looks fine with just the brushing, don't smudge it! You will probably make it look worse. This happens to me a lot when I get a bit smudge-happy and I have to use good 'ol Mr. Undo again.)
And here is my final result:
[Alissa]'s Avatar Edit Tutorial (For Photoshop/Photoshop Elements)
Notes: I happen to be using Photoshop Elements on a Mac with a mouse. I have no tablet. If you are looking for a tutorial that involves a tablet, you are in the wrong place. Also, if you have problems with my screencaps, then go away. All complaints go straight to 6blackraven9.
1. Decide who you want to make your avatar look like. It's easier to edit your avatar when you have a reference picture. You can also steal colors from said reference picture, therefore making your life much easier. So, I will get my reference picture. Paste it into your graphics program.:
2. Then get a naked avatar. You can use your own or you can get one off of GAC or GAvSim. Here is mine. Paste it into your graphics program:
3. Zoom in to 'Fit on screen.' Make a new layer and start drawing on one of the clothing items. I'll start with her top. Take two colors from the picture with the Eyedropper: One dark and one lighter. Use the darker one to outline the shape of the item you are editing onto the avatar. Make sure you are using the pencil tool: size one. After that, use the pencil tool or the fill tool to fill in the item. (The fill tool overflows, so you will have to erase some things.) Continue doing this with all other items until you have the outline and the fill of everything.
4. Once you have finished doing the simple things, start to add more detail. Make sure you have a separate layer for everything. Layers are your friends. As you can see, I added cuffs and buttons to the shirt:
5. After you finish adding everything, it's time for the shading. Wahoo! And my edit is actually starting to look like the uniform Hiyono is wearing. Hooray! Use the eyedropper tool to get a darker color to use, as well as a lighter color, different than the colors used on the item. If you need to, take the color from your edit and change it so it is darker (/ lighter). Now use the brush tool. Choose one of those fadey-brush thingies with a size two or three. (Sometimes even one) I will use a size two. Make a new layer and stick it right over the layer of the article of clothing you want to shade. I will label my layer "Top shading" and put it on top of the layer "Top." I take my fadey brush thingy in a darker color and shade the areas that need to be shaded with it. Don't worry if it looks bad. Don't try to fix it yet. With pleated skirts (I make my pleated skirts weird), add a lot of shading. It ends up looking better that way:
6. Smudgy time! The smudge tool is one of my favorite tools, and without it and the Undo feature, I don't think I would be able to edit avatars. Take the smudgy tool and set it to a strength of about 70% with a brush size of 3. Smudge what you think is needed. (Example: If you think the shading looks fine with just the brushing, don't smudge it! You will probably make it look worse. This happens to me a lot when I get a bit smudge-happy and I have to use good 'ol Mr. Undo again.)
And here is my final result:
sinister+soul's tutorial
For my tutorial, I'm adding tips for paint.
Tip 1:
When you need a color, it's better take a long time to find what your looking for. Don't half-a** it because it will look bad.
Tip 2:
Use the paint sucker to your advantage! If you make a color, save your work, and close, you won't have those colors back. So that's what that handy tool is there for!
Tip 3:
Shading is possibly the hardest to do. It's easiest to zoom in very close, therefore getting a better vantage. So, the magnifying glass is pretty much the best tool, and most important you have.
Tip 4:
If you mess up and make the shading to dark, just go to colors and edit colors, go to custom colors, and make it a bit brighter or darker, then use the filler to fill in your mistake.
Tip 5:
Try to get everything first try; if you don't, and just try to fix it from where you are, then you might not get it back to its original state. You can only undo 3 times (what a rip!)
Whitecoal's Tutorial
Part 1: The Basics
A note: I operate on Windows using Photoshop 6.0 and a mouse. So, if you use other things, just follow along, you may learn something you can use.
Okay, to start off you need an Avatar to work with. I suggest you practice on yourself a bit before doing real quality work. So, go to your Profile page, and click on the "Customize Me? button behind the big version of you. Next, you need to strip. Hit the "Unequip All? button.
Next, hit the "Save Changes" button. Do not fret! You won't be naked for long... unless you want to be eek . So, proceed up to the top of the page where your avatar is sitting there getting cold.
Right click and save target as. I normally save a BMP files when working with avatars. So, open up Photoshop (see note at top) and open up the file you just saved.
The next step is totally optional, but I always do it because it makes the avatar easier to work with.
So, you seem to have a terrible white blankness surrounding your avatar! Here is how you get rid of it:
Take the polygonal lasso tool and select around the entire avatar, with no white. I do not suggest using the magic wand, it yields bad results. When you have selected the entire Avatar, do Layer>Select Inverse. Then just hit delete.
Only the white should have disappeared! If not, Edit>Undo, and try again.
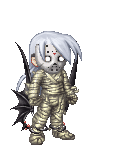
Next we are going to create an object on our Avatar. In this case, I did a weird shirt-thing. Take the pencil tool (hold down on the paintbrush tool if you can't see it) at and draw your shape. Make sure it is on a separate layer!
Next, (make sure that the layer is selected; Ctrl-click the layer) take gradually darker and darker colors, and draw a basic idea of where the light is coming from. (A tutorial on light is coming soon) For now, just know that there should be light and dark areas apposing each other, and work with it.
Next take the smudge tool and smudge it till it looks good. I can't explain this much, you just have to go with the flow. If you see hints of the color beneath showing through push the colors back the opposite way.
Lastly, you may want to add a border line, but this is not necessary.
This is just a basic tutorial. There will be more detailed ones to follow.
A note: I operate on Windows using Photoshop 6.0 and a mouse. So, if you use other things, just follow along, you may learn something you can use.
Okay, to start off you need an Avatar to work with. I suggest you practice on yourself a bit before doing real quality work. So, go to your Profile page, and click on the "Customize Me? button behind the big version of you. Next, you need to strip. Hit the "Unequip All? button.
Next, hit the "Save Changes" button. Do not fret! You won't be naked for long... unless you want to be eek . So, proceed up to the top of the page where your avatar is sitting there getting cold.
Right click and save target as. I normally save a BMP files when working with avatars. So, open up Photoshop (see note at top) and open up the file you just saved.
The next step is totally optional, but I always do it because it makes the avatar easier to work with.
So, you seem to have a terrible white blankness surrounding your avatar! Here is how you get rid of it:
Take the polygonal lasso tool and select around the entire avatar, with no white. I do not suggest using the magic wand, it yields bad results. When you have selected the entire Avatar, do Layer>Select Inverse. Then just hit delete.
Only the white should have disappeared! If not, Edit>Undo, and try again.
Next we are going to create an object on our Avatar. In this case, I did a weird shirt-thing. Take the pencil tool (hold down on the paintbrush tool if you can't see it) at and draw your shape. Make sure it is on a separate layer!
Next, (make sure that the layer is selected; Ctrl-click the layer) take gradually darker and darker colors, and draw a basic idea of where the light is coming from. (A tutorial on light is coming soon) For now, just know that there should be light and dark areas apposing each other, and work with it.
Next take the smudge tool and smudge it till it looks good. I can't explain this much, you just have to go with the flow. If you see hints of the color beneath showing through push the colors back the opposite way.
Lastly, you may want to add a border line, but this is not necessary.
This is just a basic tutorial. There will be more detailed ones to follow.
Aradeyl's Tutorial
Zis is my little tutorial on how to do hair when you avatar edit. Everyone always compliments me on my edit's hair and I thought I'd share.
First off I use Photoshop Elements 2 but I know this works with any photoshop with burn, dodge and smudge. Heck, if you know what you're doing in paint shop pro, the knowledge is universal.
Step #1
Take your base avatar, now add one layer on top of it. Use that layer for the hair. (Note: You don't need to add a new layer, if you want to do all your clothes on the base layer go for it. Making a new layer just makes it easier to edit afterwards if you realize you made a boo boo.)
Take a one pixel sized pencil (Note: Use the paintbrush if you can erase all the faded pixel parts, pencil just works better for me.) and outline the shape of the hair and any heavy shadowed areas like so:

Step #2
Fill in the outline with a lighter shade of the same colour. You can clean up some of the rough lines by colouring over them with your lighter colour. Fill in all of the outline you've made. This is your base colour. Your filled in outline should look something like so:

Step #3
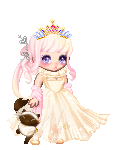
Pick two to three colours that are lighter shades than your base colour. You'll use these for medium highlights and extreme highlights. Fill in with the darker of your two colours, the medium highlight. Do the same for your extreme highlights. Be careful to mind the light source and how shiny you want the hair. (Note: If you're using ms paint or any program without burn, dodge, or smudge you can stop here. Consider adding more midtones to even out the shading unless you're happy with the end product.) When you're done penciling in your highlights, it should resemble something like this:

Step #4
Crack out the smudge brush folks! Take the smudge tool to the hair, smudging in the direction of the hair. Don't forget about the direction! Nothing like a nice outline of long straight hair and horizontal streaks of highlights to make you cringe. Direction is important. Try your best not to smudge outside of the outline, it won't look like the rest of the hair. If you think you're done, your colours should look kinda like this:

Step #4.2
If you make a boo boo while smudging, feel free to pencil in more of the desired colour and smudge that in.This can be used to save highlights that have been dominated by lowlights or create dark areas in light. I went back and fixed a few things, made things brighter:

Step #5
Bring out your burn and dodge tools baby! Now, for those of you who don't know, (Burn=Colour+Black) and the more you apply it the darker your colour will get and (Dodge=Colour+White) and the more you apply that the lighter your colour will become. Brighten up your highlights with dodge and feel free to deepen shadows with the burn. If you want you can smudge areas to make them blur together better, but a pro like you won't have to do that right? Here's what I've gotten messing with burn and dodge:

Step #6
If you know how to set your layer style to colour (Color for you American editors) you can go ahead and make a new layer, set it to colour, and paintbrush in some funky colours onto your hair. I came out with this nuclear explosion of rainbow:

First off I use Photoshop Elements 2 but I know this works with any photoshop with burn, dodge and smudge. Heck, if you know what you're doing in paint shop pro, the knowledge is universal.
Step #1
Take your base avatar, now add one layer on top of it. Use that layer for the hair. (Note: You don't need to add a new layer, if you want to do all your clothes on the base layer go for it. Making a new layer just makes it easier to edit afterwards if you realize you made a boo boo.)
Take a one pixel sized pencil (Note: Use the paintbrush if you can erase all the faded pixel parts, pencil just works better for me.) and outline the shape of the hair and any heavy shadowed areas like so:
Step #2
Fill in the outline with a lighter shade of the same colour. You can clean up some of the rough lines by colouring over them with your lighter colour. Fill in all of the outline you've made. This is your base colour. Your filled in outline should look something like so:
Step #3
Pick two to three colours that are lighter shades than your base colour. You'll use these for medium highlights and extreme highlights. Fill in with the darker of your two colours, the medium highlight. Do the same for your extreme highlights. Be careful to mind the light source and how shiny you want the hair. (Note: If you're using ms paint or any program without burn, dodge, or smudge you can stop here. Consider adding more midtones to even out the shading unless you're happy with the end product.) When you're done penciling in your highlights, it should resemble something like this:
Step #4
Crack out the smudge brush folks! Take the smudge tool to the hair, smudging in the direction of the hair. Don't forget about the direction! Nothing like a nice outline of long straight hair and horizontal streaks of highlights to make you cringe. Direction is important. Try your best not to smudge outside of the outline, it won't look like the rest of the hair. If you think you're done, your colours should look kinda like this:
Step #4.2
If you make a boo boo while smudging, feel free to pencil in more of the desired colour and smudge that in.This can be used to save highlights that have been dominated by lowlights or create dark areas in light. I went back and fixed a few things, made things brighter:
Step #5
Bring out your burn and dodge tools baby! Now, for those of you who don't know, (Burn=Colour+Black) and the more you apply it the darker your colour will get and (Dodge=Colour+White) and the more you apply that the lighter your colour will become. Brighten up your highlights with dodge and feel free to deepen shadows with the burn. If you want you can smudge areas to make them blur together better, but a pro like you won't have to do that right? Here's what I've gotten messing with burn and dodge:
Step #6
If you know how to set your layer style to colour (Color for you American editors) you can go ahead and make a new layer, set it to colour, and paintbrush in some funky colours onto your hair. I came out with this nuclear explosion of rainbow:
AznNick204's Tutorial
Avi edit tutorial: Photoshop7.0//aznnick204
Step1: Get a naked avatar ( either use your own avatar unequipped or find some other place to get one).
Once you have one, open it up in a program such as photoshop, ms paint etc. for this tutorial I am using photoshop7.0
If you are cosplaying your avatar, open a reference image beside it. (Note: it is easier to work zoomed in)
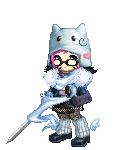
Step2: I start off the edit with the smallest things. In this case, the eyes.
To just change the color of the eyes, use the poligonal lasso tool, and outline what you want colored. Close it up (finish the selection) and then enter "ctrl u" and click colorize. Fiddle with the color scheme until you get what you want.
It should end up something like this:
Step3: To do the clothes start with what will be behind (in the back). Use the brush tool ( opacity=100% on normal ) and draw on the piece with one solid color to start.
Step4: Use the brush tool ( opacity=10% on darken ) and shade the areas that would be shadowed to show folds and depth and whatnot. If it is not dark enough just keep shading. Make sure you dont make it too dark.
Step5: Use the the brush tool again ( size=1 opacity=100% on normal ) and color small black lines in the darkest areas. I recommend to just make a line or something. Next use the smudge tool ( size=1 strength=50% ) and smudge the shadings with the black lines and the non shaded colors to make each shading flow together. Next get the brush tool once again ( size=1 opacity=10% on color dodge ) and highlight the spots you think should be highlighted. Again, if its not bright enough keep highlighting the same place. Do not make it so bright that it looks plastic. get the smudge tool and smudge the highlights.
Step6: Repeat steps 4 and 5 for all the other clothes. When you are done it will look something like this:
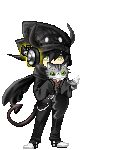
Step7: For things like fur repeat step five and make it like clothing; only this time use the smudge tool and smudge the edges to make it have that sort of furry effect. ( yeah it doesnt really look furry but it works )
Step8: Try practicing editing and try new things like positioning body parts by drawing them by scratch to make them look even more awesome. Again, all you need to do is practice. Even the pros needed to practice.
I'm no pro myself but this is what my ending results were;
Step1: Get a naked avatar ( either use your own avatar unequipped or find some other place to get one).
Once you have one, open it up in a program such as photoshop, ms paint etc. for this tutorial I am using photoshop7.0
If you are cosplaying your avatar, open a reference image beside it. (Note: it is easier to work zoomed in)
Step2: I start off the edit with the smallest things. In this case, the eyes.
To just change the color of the eyes, use the poligonal lasso tool, and outline what you want colored. Close it up (finish the selection) and then enter "ctrl u" and click colorize. Fiddle with the color scheme until you get what you want.
It should end up something like this:
Step3: To do the clothes start with what will be behind (in the back). Use the brush tool ( opacity=100% on normal ) and draw on the piece with one solid color to start.
Step4: Use the brush tool ( opacity=10% on darken ) and shade the areas that would be shadowed to show folds and depth and whatnot. If it is not dark enough just keep shading. Make sure you dont make it too dark.
Step5: Use the the brush tool again ( size=1 opacity=100% on normal ) and color small black lines in the darkest areas. I recommend to just make a line or something. Next use the smudge tool ( size=1 strength=50% ) and smudge the shadings with the black lines and the non shaded colors to make each shading flow together. Next get the brush tool once again ( size=1 opacity=10% on color dodge ) and highlight the spots you think should be highlighted. Again, if its not bright enough keep highlighting the same place. Do not make it so bright that it looks plastic. get the smudge tool and smudge the highlights.
Step6: Repeat steps 4 and 5 for all the other clothes. When you are done it will look something like this:
Step7: For things like fur repeat step five and make it like clothing; only this time use the smudge tool and smudge the edges to make it have that sort of furry effect. ( yeah it doesnt really look furry but it works )
Step8: Try practicing editing and try new things like positioning body parts by drawing them by scratch to make them look even more awesome. Again, all you need to do is practice. Even the pros needed to practice.
I'm no pro myself but this is what my ending results were;
Thank you all very much for reading the tutorials!
Please Note that I had to edit the tutorials slightly (spelling and such).
Advertisments:
If you would like to advertise in this space please PM me. I will not advertise all things, only those I approve of.
Whitecoal's Avatar Edit Shop! Click on the journal icon in my signature!
The Laundry Basket of Doom