Welcome to Gaia! ::

Reply Guild Services
Seige's Tut's - How to post an image with Photobucket

Quick Reply

Enter both words below, separated by a space:

Can't read the text? Click here

Submit

Did you find this useful?
Yes
0%
 0%  [ 0 ]
No
0%
 0%  [ 0 ]
Total Votes : 0


DeletedChar11111111111
Captain

PostPosted: Fri Feb 29, 2008 11:55 pm


This is a manual for posting an image on Gaia it is real detailed so even a real newbie can understand it. it is also my first real attempt at a Tut (tutorial, guide or manual) so if there is anything you still don't get PM and i will explain it better.


What you will need:


- Windows (I used XP but it should be about the same for any other vertion above 95)

- a Browser such as Internet Explore, Firefox or Flock


if something doesn't make sense try going back a few steps
PostPosted: Sat Mar 01, 2008 12:22 am


Step 1 – knowing your format

There are many kinds of images that your computer can use but the internet can pretty much only use 3 (some browsers see more but it’s easier to ignore this fact). gif, jpeg, and png.

To figure out what kind of image you are using right click on the file in windows and open the file menu to select open with then choose program. In this example we are looking at a file called Kefka it should look something like this:

User Image


User Image

In this case we see the full file name ends with .gif hence we know this is a gif file and ok for online use

Other files that are ok are .jpeg or .jpg or .jpe (all jpeg files) and .png

Files such as .bmp, .fla, .doc and .tif may not work well with all browsers and are not recommended.

DeletedChar11111111111
Captain


DeletedChar11111111111
Captain

PostPosted: Sat Mar 01, 2008 1:00 pm


Step 2 - Creating a Photobucket Account

if you already have one skip to step 3

There are many image hosting options available, one of which is Photobucket, this is completely free!

Firstly, you must go to the site and register before you can use it.

the address is: http://photobucket.com/

simply click on one of the join now buttons and follow the process.

IMPORTANT: it may ask you if you would like some extra service of sponsored thing, you'll want to skip this.

User Image
PostPosted: Sat Mar 01, 2008 1:27 pm


Step 3 - making an album with photo bucket

This is optional but recommended, an album in Photobucket is what a folder is to windows. it helps keeps things organized.

all you have to do is type the name you want your album to be then hit save. and your album is created. I recommend having one called "Gaia Stuff".

User Image

once you have made this the navigation area will look like this

User Image

you can just click on you main album to go back or stay in the album if that is where you want to upload images, you can even make albums within albums.

When you go back or log in you can get back to you album from the same area.

User Image

DeletedChar11111111111
Captain


DeletedChar11111111111
Captain

PostPosted: Sat Mar 01, 2008 2:24 pm


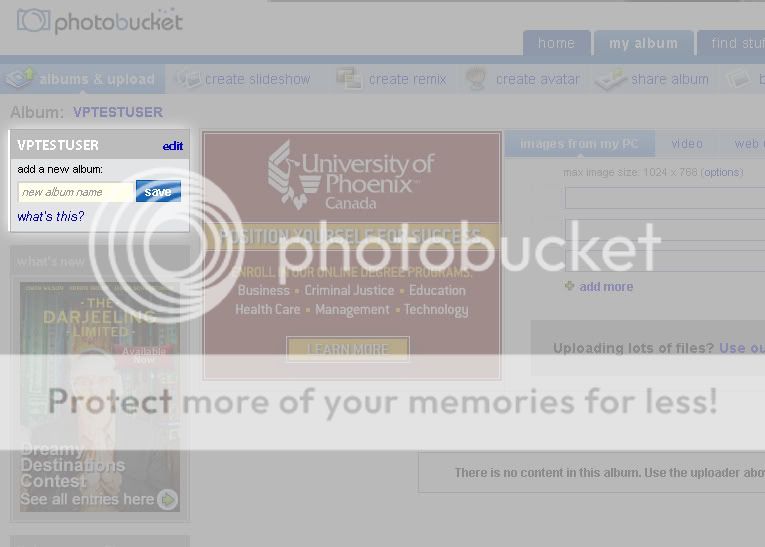
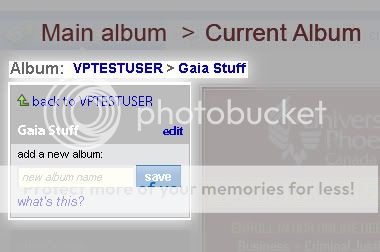
Step 4 - Uploading an image to Photobucket

First login to Photobucket and enter the album you want the image in (this "gaia stuff" for those who followed step 3)

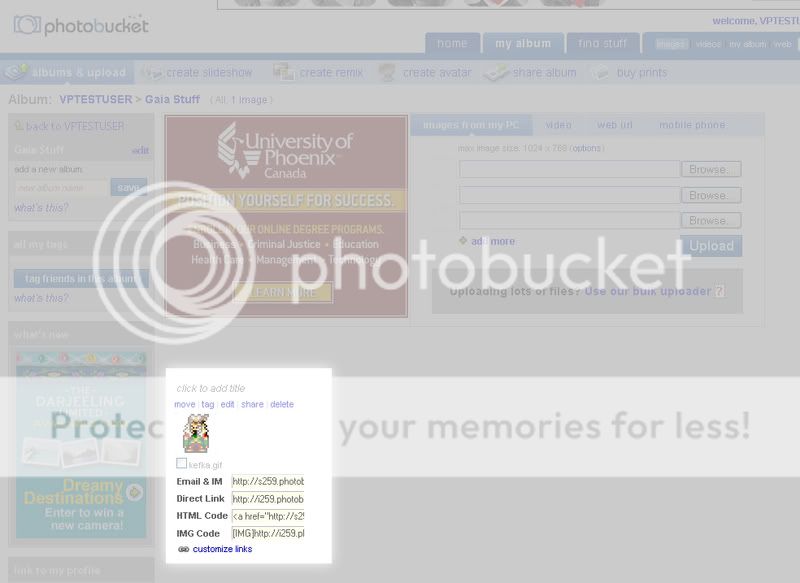
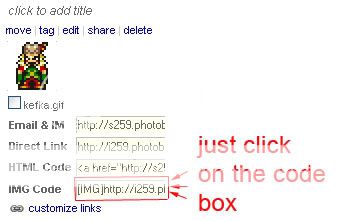
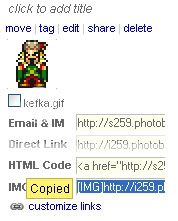
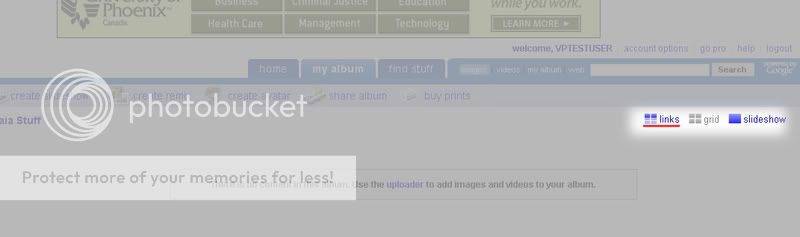
you should see a link panel like this

User Image

if you do not then you may have the wrong view setting. look for the 3 view options the upper right corner and make sure you are in LINK mode

User Image

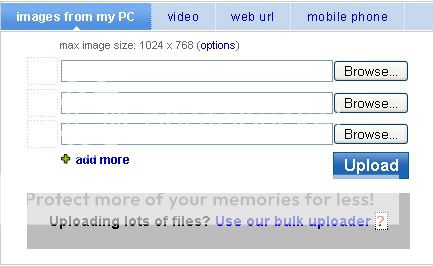
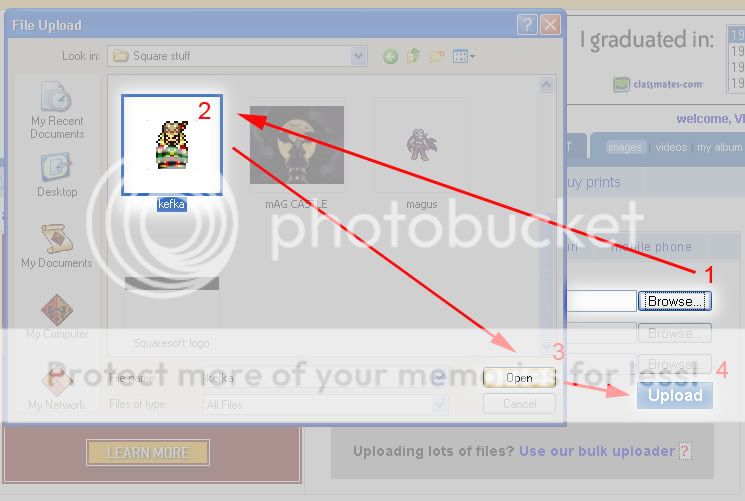
the next step is to hit the top of the three browse buttons(1), then use the browse window to find the image you want to upload(2). Once you have done this this press load(3).

If you have multiple images you can use the other two browse buttons to upload up to three at a time. (there are ways of updating even more but i do not recommend it as it is really laggy and can mess up).

Once you have your image or images opened in the browsers press the upload button(4).

User Image


IMPORTANT: things tend to freeze up here allot you may have to cancel and try again. this is why i only recommend 3 at a time


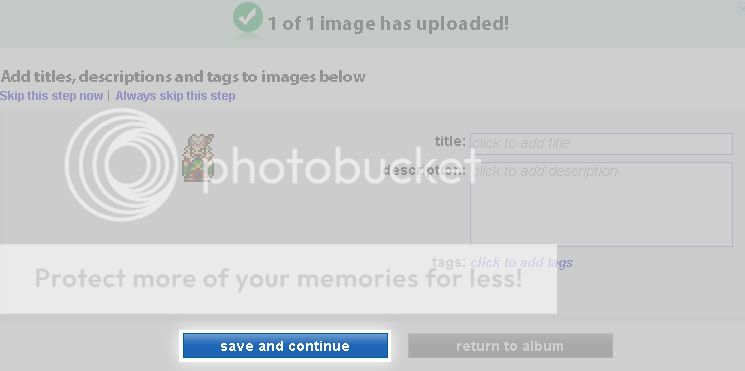
the next screen will let you add a title tags and description to your image. This won't have any effect on how it is seen on Gaia. it is more for personal reference and how others will see your photo on Photobucket (assuming you have a public album). You can choose to leave these all blank if you want, you can always change it later.

Next press the save and continue button


User Image
Now you image is uploaded and can be used whenever you need it!
you can log into Photobucket from any computer with net access, and show images to anyone.

You should see the image under the link panel

User Image
PostPosted: Sat Mar 01, 2008 2:58 pm


Step 5 - From Photobucket to Gaia

This is the easiest step

Gaia uses a language called BBC, Photobucket has already written the BBC code for you put your image into Gaia. Photobucket call BBC code IMG code for some reason but its still easy to find.

if your not already there log into Photobucket and go to the album with your image in it.

all you have to do is copy the BBC code, no ctrl-C required just click on the IMG code box, and it will automatically be copied for you.

User Image

you should see a little yellow box flash on beside the box telling you that is was copied

User Image

now thats left is to paste it. you can use the code in pretty much any thread to display a picture.

to past simply hit the control (ctrl) and V keys at the same time or right click in the text field and select paste from the menu.

User Image
the code will be added for you, it should look something like this in the text box

[IMG]http://i259.photobucket.com/albums/hh289/USERNAME/Gaia Stuff/IMAGENAME[/IMG]


however once you preview or submit it replaces all that code with your image

User Image

you can just paste multiple times to get multiple images

User ImageUser ImageUser ImageUser ImageUser ImageUser ImageUser ImageUser Image

DeletedChar11111111111
Captain


DeletedChar11111111111
Captain

PostPosted: Sat Mar 01, 2008 3:05 pm


Thats all there is to it just keep some things in mind

- your Photobucket albums are not defaulted to private

- those this can work for it, there is a few extra steps i strongly recommend for making signature pictures (ill make a tut for that later if someone wants)
Reply
Guild Services

 
Manage Your Items
Other Stuff
Get GCash
Offers
Get Items
More Items
Where Everyone Hangs Out
Other Community Areas
Virtual Spaces
Fun Stuff
Gaia's Games
Mini-Games
Play with GCash
Play with Platinum