1. This faceup is on a girl head but I am creating a boy so yeah he may still look rather feminine.
2. I was doing this faceup late and in a badly lit room so it's not nearly as perfect as I'd like. Also some of the pictures are really bad. And...it's on my bedroom floor for lack of a better place.
3. I'm by no means a pro but I'm practicing more and more. (And as a side note, I do accept commissions! 8D)
Moving on xD
Tools list! Going from left to right. Some of the supplies I'll be using will be detailed later on.

1. A variety of brushes. I generally don't use too many different brushes but I have lots on standby! xD
2. A white watercolour pencil and an eraser sharpened to a point.
3. Chalk Pastels. I use Mungyo Pastels that I bought from Soom.
4. A cup of water. For obvious reasons.
5. A willing dollie head.
6. MSC UV Cut FLAT or similar sealant. I have only ever used Testors Dullcote (Which I hate) and MSC UV Cut FLAT. You can also just use MSC FLAT. I don't know about other sealants.
7. A variety of Acrylic paints. I'm only using black and brown today because Ryo has a very natural faceup.
8. A palette for paint.
9. Paper towels (not really used much)
Other things that you don't see pictures are:
Acrylic gloss, Magic eraser, and Specific brushes.
Closeups of supplies:


Step 1: Seal your head with the sealant. I have already pre-sealed Ryo's head. It's a good idea not to inhale your sealant and I recommend sealing outside. If you're not, use a good mask to keep your lungs safe.
Step 2: Eyebrows:
I Always start with eyebrows (since I tend to wipe away blushing if I don't.) I'm using a dark brown for Ryo's eyebrows.

Start with a dry brush. Angled and smaller is preferred. Drag it over your chosen pastel and use the pastel to draw a general outline of what you'd like your eyebrows to look like. Don't worry if it's a bit messy, we'll be fixing it up later.

Using your sharpened eraser fix up the edges of the eyebrows.


And finally, repeat on the other side. I kind of fail at symmetry tonight so excuse the different eyebrows later. One of his eyes is almost always covered so it's not so bad for him.

Step 3: Blushing. Lips and cheeks.
Using a fluffier brush (I use makeup brushes) choose your blush colour. Ryo's a normal skin so I'm using a combination of pink and light brown.

Follow the jawline in an upwards direction onto the cheeks. I also blush the chin lightly to give a bit more colour.

It's hard to see here but you can see the cheek blushing.
Using your angled brush again, choose a lip colour you like and, starting at the mouth crease where the lips meet, move toward the outside of the lip. Make sure to clean up any stray pastel with a big fluffy brush and a magic eraser. You don't want smudged pastel getting sealed on.
I used my white watercolour pencil on Ryo's lips to draw lip lines. They didn't come out very well because he's got texture in his lips but it's alright.

AT THIS POINT I DO ANOTHER LAYER OF SEALANT TO PROTECT THE PAINT. I tend to make mistakes when I paint and use water to remove it. If you don't seal between the pastel will get pushed around by water if you use it.
Step 4: Paint

I'm using Brown and black to do the paint. I want a slightly darker shade of brown so I'm adding one drop of black to my brown paint. I use a junk brush to add a bit of water and mix so the paint is a little thinner.

Using a thin brush (Some people use thinner but I find I can get the lines I need with this brush) get a VERY LITTLE bit of paint on the brush. If you get too much you can always test the lines. Sometimes people use watercolour pencil instead of paint on the eyebrows but I don't.
Draw the hairs slowly. It's best to do it right not fast.


And here I got lazy and forgot to take pictures. I did the other side and then lined the top lid. Depending on the look you want you can choose to do more or less. Later I mess this up cause I tried to do too much and wasn't happy with what I had xP

Using the same method as the eyebrows, paint in the bottom lashes. I start at the outer corner of the eye and paint the holding the head upside down. It'll look a bit bare at first but it's okay.
I also added dots in the corners of the mouth. These aren't necessary but Ryo needs more expression.

Finally I added some of the dark brown pastel in the bottom lashes and around the corners of the eyes. It helps to accentuate the lashes a bit. You can see where I messed up a bit ~.~

Also, YAY PINK JAMMIE PANTS!
Now seal everything again! ^^ This is the last coat of sealant.
Step 5: Gloss
Simple enough step. You can use any acrylic water based gloss generally. If you're not sure test it in the headcap. I used this for Ryo:

And simply painted his lips with it and around his eyelids.

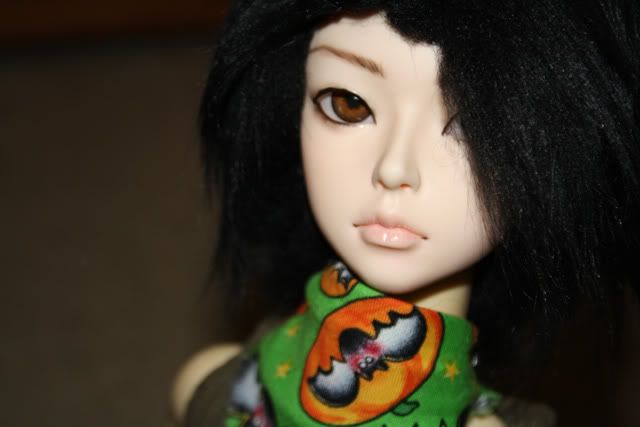
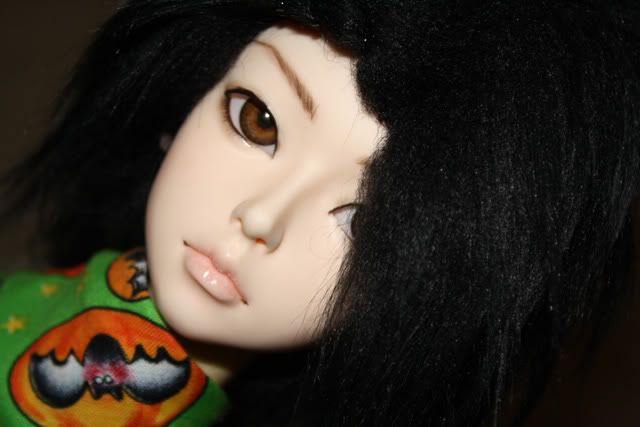
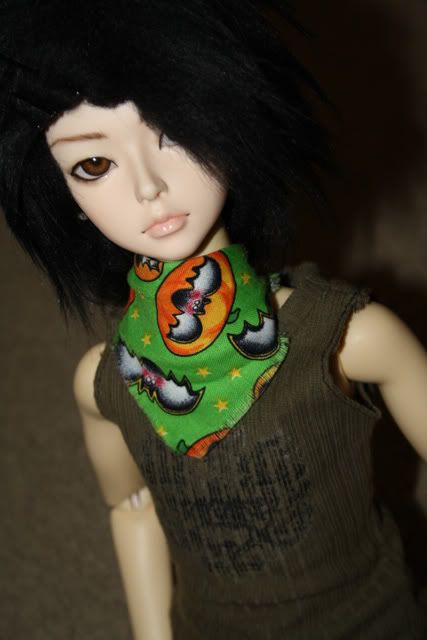
Once the gloss was dry I placed his eyes

And done!


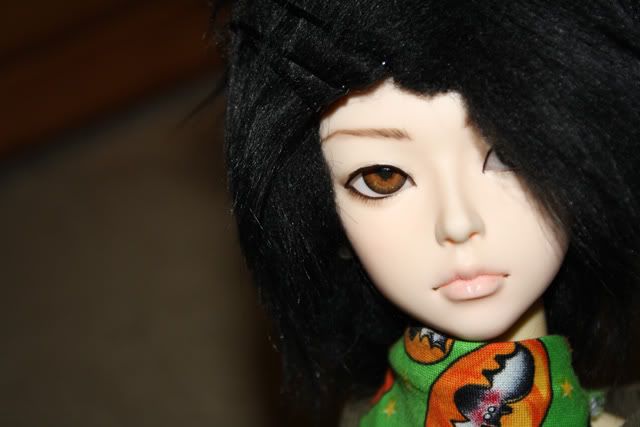
Again it's not the greatest tutorial but I did end up doing it. Haha! Hope this helped!
1. A variety of brushes. I generally don't use too many different brushes but I have lots on standby! xD
2. A white watercolour pencil and an eraser sharpened to a point.
3. Chalk Pastels. I use Mungyo Pastels that I bought from Soom.
4. A cup of water. For obvious reasons.
5. A willing dollie head.
6. MSC UV Cut FLAT or similar sealant. I have only ever used Testors Dullcote (Which I hate) and MSC UV Cut FLAT. You can also just use MSC FLAT. I don't know about other sealants.
7. A variety of Acrylic paints. I'm only using black and brown today because Ryo has a very natural faceup.
8. A palette for paint.
9. Paper towels (not really used much)
Other things that you don't see pictures are:
Acrylic gloss, Magic eraser, and Specific brushes.
Closeups of supplies:
Step 1: Seal your head with the sealant. I have already pre-sealed Ryo's head. It's a good idea not to inhale your sealant and I recommend sealing outside. If you're not, use a good mask to keep your lungs safe.
Step 2: Eyebrows:
I Always start with eyebrows (since I tend to wipe away blushing if I don't.) I'm using a dark brown for Ryo's eyebrows.
Start with a dry brush. Angled and smaller is preferred. Drag it over your chosen pastel and use the pastel to draw a general outline of what you'd like your eyebrows to look like. Don't worry if it's a bit messy, we'll be fixing it up later.
Using your sharpened eraser fix up the edges of the eyebrows.
And finally, repeat on the other side. I kind of fail at symmetry tonight so excuse the different eyebrows later. One of his eyes is almost always covered so it's not so bad for him.
Step 3: Blushing. Lips and cheeks.
Using a fluffier brush (I use makeup brushes) choose your blush colour. Ryo's a normal skin so I'm using a combination of pink and light brown.
Follow the jawline in an upwards direction onto the cheeks. I also blush the chin lightly to give a bit more colour.
It's hard to see here but you can see the cheek blushing.
Using your angled brush again, choose a lip colour you like and, starting at the mouth crease where the lips meet, move toward the outside of the lip. Make sure to clean up any stray pastel with a big fluffy brush and a magic eraser. You don't want smudged pastel getting sealed on.
I used my white watercolour pencil on Ryo's lips to draw lip lines. They didn't come out very well because he's got texture in his lips but it's alright.
AT THIS POINT I DO ANOTHER LAYER OF SEALANT TO PROTECT THE PAINT. I tend to make mistakes when I paint and use water to remove it. If you don't seal between the pastel will get pushed around by water if you use it.
Step 4: Paint
I'm using Brown and black to do the paint. I want a slightly darker shade of brown so I'm adding one drop of black to my brown paint. I use a junk brush to add a bit of water and mix so the paint is a little thinner.
Using a thin brush (Some people use thinner but I find I can get the lines I need with this brush) get a VERY LITTLE bit of paint on the brush. If you get too much you can always test the lines. Sometimes people use watercolour pencil instead of paint on the eyebrows but I don't.
Draw the hairs slowly. It's best to do it right not fast.
And here I got lazy and forgot to take pictures. I did the other side and then lined the top lid. Depending on the look you want you can choose to do more or less. Later I mess this up cause I tried to do too much and wasn't happy with what I had xP
Using the same method as the eyebrows, paint in the bottom lashes. I start at the outer corner of the eye and paint the holding the head upside down. It'll look a bit bare at first but it's okay.
I also added dots in the corners of the mouth. These aren't necessary but Ryo needs more expression.
Finally I added some of the dark brown pastel in the bottom lashes and around the corners of the eyes. It helps to accentuate the lashes a bit. You can see where I messed up a bit ~.~
Also, YAY PINK JAMMIE PANTS!
Now seal everything again! ^^ This is the last coat of sealant.
Step 5: Gloss
Simple enough step. You can use any acrylic water based gloss generally. If you're not sure test it in the headcap. I used this for Ryo:
And simply painted his lips with it and around his eyelids.
Once the gloss was dry I placed his eyes
And done!
Again it's not the greatest tutorial but I did end up doing it. Haha! Hope this helped!