


The one I'm going to get pictures of is going to be kind of tricky because the fabric I want to use is shear, so I'm going to actually use 2 layers of fabric and treat them as one... I'll make sure the pictures are nice and clear though!
Edit: The kimono I was working on (a commissioned piece) came out too narrow (thus the note on the measurements).. it might be able to fit a 5 year old, but if an adult tries to wear it, something will hang out rolleyes
So, for the sleeves, you shall get pics of this kimono, as it is the one I'll be making before I work any more on my own... I just need to go back and get a bit more fabric.. this is much narrower than I thought it was sweatdrop
Also, you may see some pics of a "maiko" sewing.. that's Izumi. She's trying to get used to the weight of the katsura (wig) before AnimeFest in September so she doesn't get a migraine the first day from it like she did at Atsuicon in 07 (the last con we went to).. and practicing her kitsuke (art of putting on/wearing kimono) and makeup.. she's going as a Geiko, but my sister-in-law grabbed the wrong katsura- it's the one she wore with her maiko costume at the last con sweatdrop
And sorry for the kimono changing in the middle of the instructions, I'll get it fixed as I finish the black kimono
The infamous Katsura - Too small! stressed

a messy Izumi checking email
Kimono is an advanced sewing project - Izumi will be doing the sewing while I take pictures. heart
this might take a couple of weeks to finish sweatdrop
Here is a site that shows how to wear kimono (for girls).. there's also several ways of tying the obi on there as well heart
Materials: (a * means it's optional)
- about 5yds of fabric (4yds for guys) -this is what Izumi and I use for our kimono.. we're both about 5'2", 120lbs
*4yds fabric for lining (pretty fabric)
*4yds fabric for lining (white fabric) -not needed for a partial lining
iron and ironing board
a LOT of space for laying out and cutting the fabric
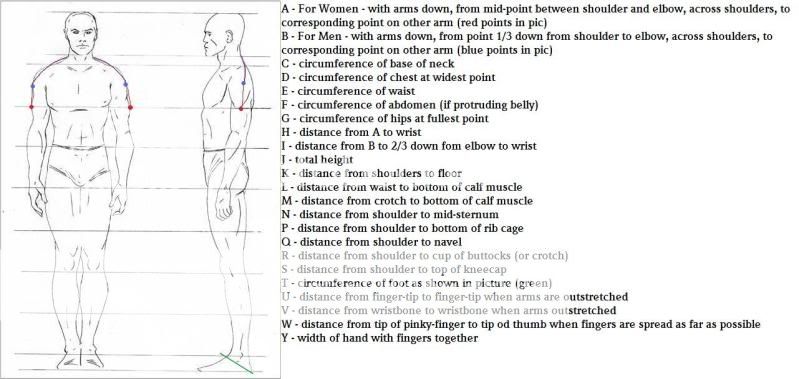
your (or whoever you're making it for) measurements
a #### load of patience
along with the usual needle, thread, *sewing machine, tape measure, pins, tailor's chalk/pencil/whatever, etc.
Measurements
Important note!
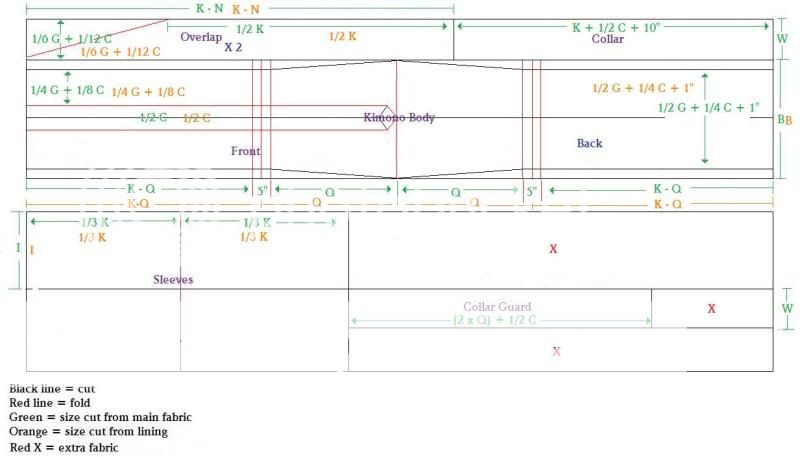
The measurements on the pics below are off for the width of the body and overlap pieces! if, say, the measurement for the body width (A+1") is 20", make each side 15" -- if it's too much, it can be easily folded into the kimono or cut.. it's better to cut the fabric larger than needed than have it be too small. For the overlap, however much you took off of that A+1" (like in the example that would be 5") is how wide you should make it. Same goes for the guy's kimono.
Marking and Cutting The Fabric

The colors didn't come out right, thanks to photobucket rolleyes
the red lines look more purple, the blue looks just a slight bit brighter than the green..
the pieces that are marked with blue are the ones marked "hem / lining" or "facing"
the length of the sleeves varies (S is the length for Uchikake [wedding over-kimono], Kakeshita [wedding kimono], and the most formal Furisode [most formal kimono for unmarried women])
here are the various sleeve lengths (the longer it is, the more formal- save for guy's, they're all the same length)
Guy's Kimono
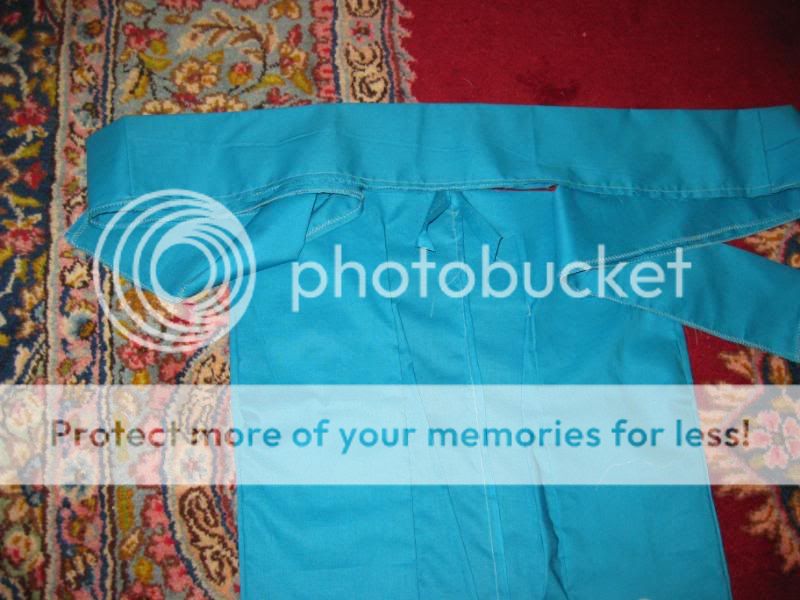
Sewing The Body the teal kimono in the pictures is lined with one color only as it is only knee length and has no sleeves... I'll pin the pieces together on the other kimono to show how to partially line the sleeves - also, for any sewing terms, check the sewing tutorial
Pictures Coming Soon!
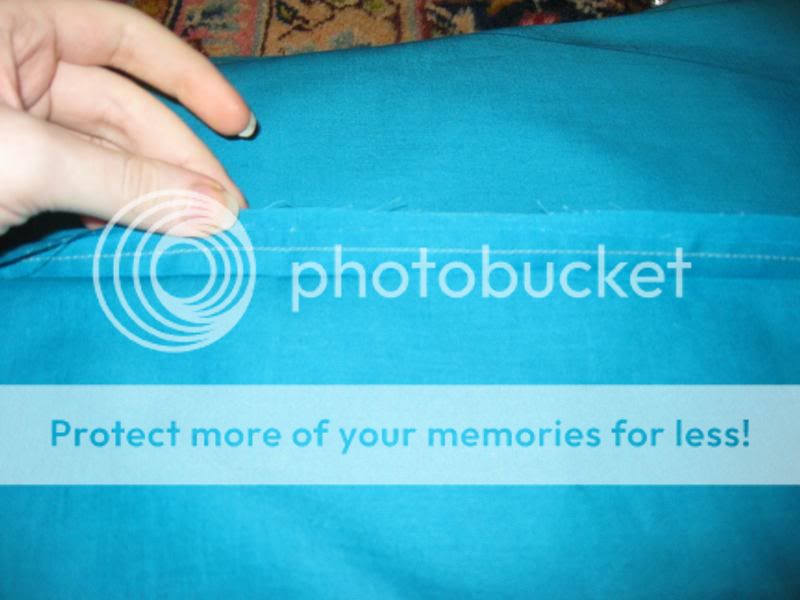
1: sew together the back seam up to the mid-way point, the two small flaps left will be folded under and help to form the shape of the neckline.

2: fold the fabric over in half lengthwise and sew the side seams save for a length of "P + 1/6 P" from the mid-way point
3: press the shoulder line (after turning it right-side-out) and the seams into kise (this is easiest done in-side-out) a kise is a special way to fold and press the seams that I, personally, have only seen on kimono. It makes for nice, sharp lines and hides any stitching that may show through if the seam were to be pulled taught.

How the edge of the arm opening is pressed


from the right side

The kise vs a normal seam- normal seam is at the top and the kise is the bottom one (that in the middle is just where the fabric was folded to bring the seams closer together)

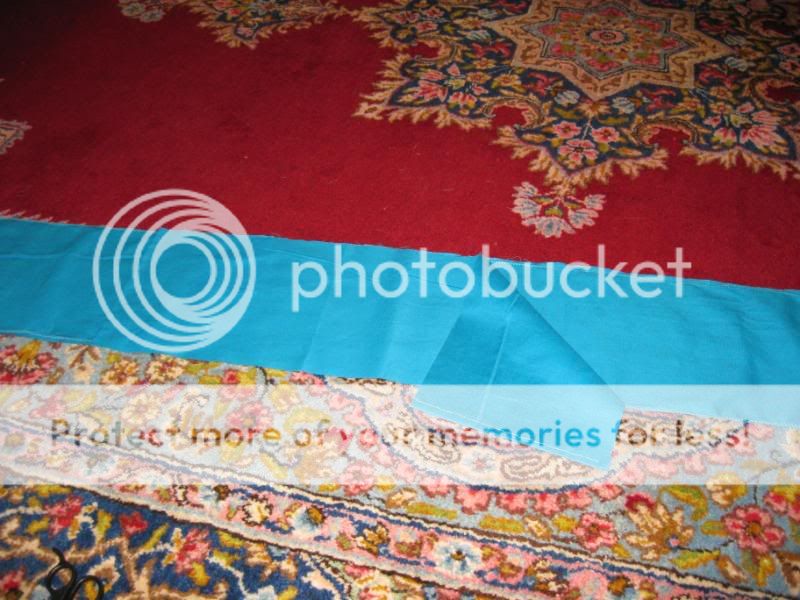
4: sew the overlap on as shown (if the "hem/lining" is the same fabric, match up the edges where it shows to be folded as shown)

5: *if making a yukata (unlined summer kimono), you don't need to bother with the "hem/lining" or "facing" of any of it
6: *for a yukata, go down into the lining section to see how to attach the sleeves and finish by hemming all edges and using a mitered-corner hem for the corners at the bottom of the kimono's "skirt"
Sewing The Sleeves
1: fold the fabric in half lengthwise and stitch up the bottom and one side all but "1/2 P" for women and "P" for guys, measuring down from the fold (the side that is to be attached to the kimono body is left open) except for 1" at the bottom for guy's
2: stitch and pull the corner as shown
3: press the "shoulder line" (the crease where it's folded), the corner as shown, and the kise
*Lining # = both lining styles #a = full lining #b = partial lining
1a: sew the sleeve lining the same as the sleeve
2a: sew the "sleeve facings" into place so they show over the lining as shown
3a: cross or catch stitch the ends
4a: sew the lining in as shown- you will need to do a double-hidden stitch down the open side of the sleeve -except for the guy's, leave it open
1b: place the lining in with the right sides together, the sleeve inside out and sew it together
2b: flip the lining piece to the other side, then cross or catch stitch around all inner edges so it doesn't show on the outside as shown
5: sew together the "hem/lining" of the body (if it hasn't been done already due to it being made of the same fabric as the main body) and press in the kise for all the seams
6: sew the bottom edges of the kimono and lining together and press the kise
7: sew up the sides and press the kise (you will want to tack the lining to the kimono in a couple of places down each inner-seam as shown)
smoothed out and pushed into place as it will be when finished
8b: cross or catch stitch the top edge of the lining to the kimono so it doesn't show on the outside
8a: sew together the body-lining as was done with the main kimono
9a: sew the bottom and side edges of the body-lining to the "hem/lining" as shown and press
10: sew the sleeves on- matching the shoulder lines sew "P" as shown (there will be "1/6 P" left open on the body --sew it all together for guy's kimono
11: press the kise into the shoulder-seam
12a: going in through the open neckline, stitch the lining to the armhole and press
A: grab the raw edges of the fabric from the inside, then flip it inside out so you can sew it together without a hidden stitch.. It's best to sew this part by hand as the fabric likes to twist up here.
Turned right side out
flattened out as it would be when folding it for storage
Collar collar is always to be done last
1: tack or pin the collar guard to the middle of the collar and press the end-seams with a kise - or, like I did; fold over the ends and do a catch-stitch before attaching it


2: stitch the outer side of the collar to the kimono - I suggest doing a basting stitch first. It may take a bit more time, but it helps ensure a nice, straight collar

3: fold the ends of the collar as shown and tack in place


4: press the collar in half, press in kise, and press the un-sewn side to match the folded edge with the kise (just check the pics.. it's confusing in words)

more pics to come
5: sew the collar the rest of the way down with a double-blind stitch - for the woman's kimono, you can either go ahead and stitch it in half again with the double-blind stitch (or fold it into fourths before step 2), add a snap to the center back to keep it folded so you won't have to fuss with it while dressing, or just fold it in half while getting dressed (it's really not that hard, you just have to remember to do it before using any koshi-himo)
The lining set in place before sewing
stitching it down
Obi
cut your fabric out, just a large rectangle (about 13ft [4m] x 1ft [30cm] wide), sew it into a long tube, slide the innerfacing in (doesn't have to be the iron-on, it all works the same, you don't have to sew it in), fold the ends in, stitch the ends closed, and iron it out flat.. easy.
to save on fabric you can have a seam in the middle of the obi (although it's likely to show) or place the seams closer to the ends.. I like to use the good fabric at the ends and a less expensive fabric in the center and back (just like the fukuro obi- patterned 60% of one side)
Fukuro obi: starting at the short end- Patterned fabric 35cm (13.75")
-Blank fabric 116cm (45.5")
-patterned fabric 206cm (~81")
I'll find the measurements for hanhaba and heko obi as soon as I can.. also, my sister-in-law should be bringing my fukuro obi so I can give the exact measurements for where to sew the pieces together
There's also an extra long obi worn by Maiko (girls training to become Geisha/Geiko) called a Darari Obi... I'll try to find the measurements for that as well... I know it's at least twice as long as a normal obi whee
Easy obi
Body: 175cm x 15cm
Musubi (bow): depends on how it's tied -please see below for measurements of the ones I've made so far (I'll post pics of my own later along with how to do them)
note: the English names are what the Google translator gave me - also, the measurements in the pictures are approximate, you'll have to play with it a bit
蝶結び pic 242cm x 30cm How to make it
片蝶結び pic
Weeping cherry tree しだれ桜 pic
Signed paperback 文庫結びpic
Out corner 角出し pic
Clam 貝の口 pic
butterfly 蝶々結び pic
pea スイートピー pic
Anemone アネモネ pic
Marigold マリーゴールド pic
Iris アイリス pic
Freesia フリージア pic
Nadeshiko なでしこ pic
Character 一文字 pic
Knot Works のし結び pic
Tabi Socks
Tabi from normal socks
1: flatten the socks out like they would be when wearing them
2: cut a slit on one side of each sock - this will determine which is the right and left sock
3: stitch it up (I hand stitched it, but you can do it on the sewing machine, just go slow!)
4: turn it right-side out and you're done!
Koshi-himo
these are the ties used to keep the kimono in place (usually 2-3 of them are used for woman's kimono- 1 for guys), you can use anything, really, but this is how the real ones are done:
made from a cheap, thin cotton, or other non-slippery fabric
cut out a long rectangle (4cm [2"] wide x 216cm long when finished), stitch it into a long tube, press, fold the ends as shown, and stitch them together - go ahead and press it again
Obijime
a cord that wraps around the obi to help the musubi (bow) stay in place and adds a decorative touch
It's easiest to just buy some cording from the fabric department - 152.5cm (60") long... any cord will do.. Here's my collection, so you can see some of the various types (I got these in a bundle pack from a seller on Ebay for $20 USD, RyuJapan -not sure if that's how it's wrote, but they have some really nice vintage kimono starting at just $5.. I got my favorite obi from them for $10, mint condition!)

Obiage
a sash tied at the top of the obi to help the musubi (bow) stay in place and add a decorative touch
You can either make one from scratch, or buy a scarf (that's what most of mine are 3nodding )
To make one from scratch, just cut out a long rectangle and hem the edges. The finished product should be about 201cm (") x 52cm (20.5").. it doesn't have to be that big, just as long as it's long enough to go around you and the obi and still has enough length to tie it comfortably - and wide enough to cover the Obimakura (a pillow used to help the musubi keep it's shape)
Special Variations
Padding
stitch the batting between the kimono and lining same as you would the lining (think of it as a second layer of lining, if that makes any more sense)
Susoshiki
Susoshiki is an extra long "trailing" kimono. It's worn by Maiko, Geiko, Kabuki actors, and dancers.
Just add enough to the length of the kimono (the body panels and the overlap pieces) so it has about 1-2ft laying on the floor (you don't wear a ohashori [the fold in the center of the kimono] for this type of kimono).. usually the bottom half of the kimono is padded or has a bit of padding at the bottom hem so it moves gracefully with your movements.
I honestly suggest using 2 layers of lining for the skirt (the pretty/color fabric) so if there are any mishaps (say catching it on a rouge nail) it won't be completely destroyed and can survive until you get a chance to repair it.
Also, add the same amount to the length of the pretty/color fabric lining so the white doesn't show
Donuki
this is a kimono worn as extra layers between the jyuban and kimono. They are hardly ever (if ever) worn anymore, but were popular among the higher class ladies before WWII.
Sleeve Variations
Folding For Storage