WARNING: this technique can cause damage to others prints and is not recommended while using a public darkroom.
Solarization is technique that is generally use for black and white pictures. But what is solarization? Now this may sound curious but solarization is literally the act of overexposing an image. So what is it that sets solarization apart from overexposure? Well the end product of solarization leaves a print with reversed tones while a typical overexposure leaves a photo black. The procedure is an easy one and can be done in a few short steps.
Note: There are many ways to carry out this technique and I will not explain them all, but this way just seemed easier to write directions out for.
Basic Procedure:
First off, proceed in doing as you would for a normal print. Do a quick test strip then print your desired picture. Simple so far. At this point place your print into the developer. Allow the full amount of time to develop (of course we all remember this from photo 101.) Next, hide the all extra photo paper in the room as well as notify anyone else that might be in the darkroom that you will be turning on a non-safe light. This is where the solarization actually begins: take a light source: flashlight, lighter, cell phone, ect. Remember the light source does matter, the stronger the light the faster your print will overexpose! Now, direct the light source of choice to the print in the developer. Apply the light in specific areas or evenly to the entire print. At this stage the extra light should appear as though its quickly darkening the photo. Keep in mind that it is important that if the photo becomes too dark that it is moved swiftly into the stop bath in order to stop the overexposure. Turn the non-safe light off and then proceed through remaining chemicals as normal. The inversed tones are not generally visible within the darkroom, so you will have to exit in order to see the final results of the print.
Examples:
Both examples were done in photoshop CS2. [ I don't have a scanner so PSCS2 will have to do]
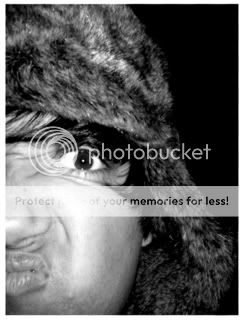
The original

Solarized

Lighting Variation:
-Translucent color filters over the light source (depending on color or opacity) can help slow down how fast light will overexpose a print.
-When using a flashlight: cover the entire light source with a pinhole lens cap* this will give your light a bit of precision. (use this just to fine tune tones)
-Take a prism or a magnifying glass and direct your light source though either object (prism or magnifying glass) and project the light towards your print in the developer. These two objects can create distinct markings/patterns/gradations.
*[To make a pinhole lens cap, take a regular lens cap and poke a hole in the center]
This is tutorial only explains the basics of solarization. For more technical information visit: http://en.wikipedia.org/wiki/Sabatier_Effect
Questions? Comments?


